What you need to know.
Support structures can rescue impossible-looking overhangs or scar your favourite surface. Learn when to use them, how they differ, and when a model can avoid them altogether.
- Supports are temporary printed scaffolding for overhangs and isolated sections that cannot start in mid-air.
- Normal supports often form columns or grids; tree or organic styles branch towards supported geometry.
- The best support is sometimes no support: orientation, chamfers and separate assemblies can avoid contact scars.
- Support removal and surface finish need real testing; no one interface gap or angle works across all printers and materials.
What are supports in 3D printing, and why do they matter?
Supports provide sacrificial material underneath features that a filament nozzle cannot reliably build in free air.
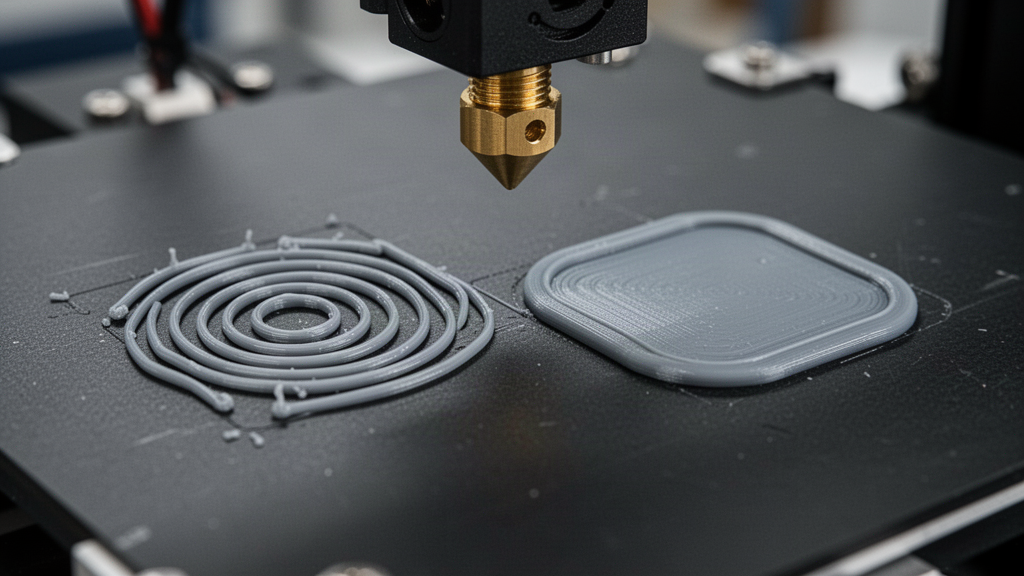
A normal filament printer lays soft material onto the bed or onto earlier, bonded material. When a design contains an arm reaching into empty space, a large roof without anything beneath it, or a decorative face at a difficult angle, the slicer may need temporary scaffolding. This support material is printed along with the object and removed afterwards. It consumes filament and time, and it can alter the underside of the finished surface.
There are no universal magic angles. How far a real printer can bridge or overhang depends on material, cooling, layer height, line width, part shape and motion. A small bridge between solid posts is not the same as a wide unsupported flat ceiling. Use the slicer's preview to examine exactly where scaffolding will appear before pressing Print.
| Approach | Typical form | Potential advantage |
|---|---|---|
| Normal supports | Vertical columns or grid-like structures | Predictable contact under broad regions |
| Tree or organic supports | Branches growing towards local overhangs | May reduce contact area on complex shapes |
| Support-free redesign | Chamfers, rotations or separate parts | No support contact scar where avoided |
What do normal or grid supports actually do?
Normal supports typically build from the plate or other allowed surfaces as vertical-ish walls, columns or grids. Their broad contact can help with predictable roofs or flat suspended surfaces. They can also consume a great deal of plastic if the slicer creates unnecessary scaffolding beneath an entire object. Tight contact may leave marks, while insufficient interface can allow the model's underside to sag.
A support is not intended to weld permanently to the model. The slicer normally uses a designed separation and sometimes a denser interface layer near the actual underside. Exactly which spacing works depends on printer calibration, material and layer height. Do not copy a generic 'best Z distance' without inspecting how it translates into your slicer's layers and extrusion paths.
Normal support can be suitable where it offers a broad stable base and a flat contact region, but it is often overkill for isolated decorative details. Before choosing it, ask whether rotating or splitting the object would reduce support material while preserving the important face.
How do tree and organic supports work?
Tree or organic-style supports use branching structures that grow towards local areas that need support. Instead of a large rectangular block of scaffolding, several slimmer trunks can merge or split around the object. This can reduce contact on certain decorative models, sometimes making removal simpler. The exact result depends on the slicer's generation algorithm, and names such as tree, organic and branching may describe somewhat different tools.
Branch supports are not always better. A tall slender trunk can be knocked loose, especially if the toolhead collides with a curling feature. Broad flat undersides may work better with stable, well-planned normal support. Branch collision clearance, tip contact and printable branch angles all matter. Inspect the complete toolpath preview, including the support itself, rather than assuming 'tree' means less time or less material.
Tree vs normal supports: which should you select?
Choose support by geometry, not by a universal preference. A broad flat overhang may benefit from stable, consistent support contact. A figure with several curved protrusions may suit organic branching, provided the branches themselves remain secure. A part with a visually important underside may need a completely different orientation. For a model meant to carry force, support removal must not conceal cracks or poor interlayer bonding.
| Model problem | Reasonable starting idea | Check before printing |
|---|---|---|
| Wide flat roof | Normal or carefully planned interface | Underside contact, rigidity and removal |
| Complex curved figure | Organic/tree candidate | Trunk stability and scar placement |
| Long narrow bridge | Maybe no supports for short tested spans | Actual cooling and sag |
| Fine decorative face downward | Reorient or split model first | Visible contact marks |
| Small isolated detail | Localised support or redesign | Tip strength and accessibility |
Print a small test section when possible. If support removal destroys delicate features, that is valuable information: simplify the geometry, change orientation or use a different print strategy instead of forcing more support material underneath everything.
Support density, contact distance and interfaces explained
A slicer may offer density, pattern, interface layers, overhang threshold, build-plate-only options and manual painting. Higher support density can improve local contact but increase material consumption and removal effort. A dedicated interface may make the underside more consistent, yet it can still leave visible texture. Separation settings must be compatible with the exact layer height and real calibration.
Manual support painting lets a designer add support only where it genuinely helps, or exclude areas where support would cause damage. It requires inspection because the printer can still fail if you remove a truly necessary structure. A support-on-build-plate-only option may prevent material starting on the model itself, but it cannot reach every interior roof or hidden recess. Check which options your own slicer and machine actually support.
How can you design a model that needs fewer supports?
Often the biggest improvement happens before a support setting is touched. Rotate the model so its largest stable face rests on the build plate, and keep its most important decorative surface clear of heavy support contact. Replace an abrupt horizontal ledge with a printable chamfer or curved transition where the design allows. Divide a complex object into simpler pieces that can be printed flat and assembled safely afterwards.
A support-free strategy must still preserve function. Splitting a thin load-bearing item can introduce a weak joint, and a dramatic rotation may change layer-bond strength. If the part supports a significant load, a person, hot equipment or regulated hardware, use an approved engineering process rather than a cosmetic slicer optimisation.
How do you remove supports without damaging the print?
Allow the object and plate to cool according to the machine and material instructions before handling. Inspect whether the supports are accessible from a safe direction. Work gradually with appropriate tools, keeping fingers clear of sharp blades and of any sudden breaking movement. A delicate decorative finger or nameplate detail may snap if you try to pull a large support away in one motion.
If support remains fused in place, do not compensate by brute force. Inspect the sliced support gap, hotend flow and actual material behaviour on a new small test. For future parts, move the support contact to a hidden surface or redesign the object in manageable sections. A rough underside does not necessarily indicate a defective printer; it may be an inherent consequence of the support and orientation chosen.
Your seven-step support planning checklist
- Open the exact final model in the slicer with the verified printer profile.
- Rotate it to protect the most important visible and functional faces.
- Inspect the overhang and bridge preview before enabling blanket support.
- Compare normal and tree/organic support generation on the same orientation.
- Check support contact surfaces, branch stability and total material use.
- Print a representative test if the support area is fragile or difficult to remove.
- Document the result, remove supports safely and revise the model if necessary.
A virtual printer can demonstrate layered motion and help you understand how an overhang might appear, but a real support plan must be generated and reviewed in a compatible slicer. For a custom-order product, confirm whether support removal and post-processing are included in the quotation. The best-looking object on screen may require a different physical manufacturing strategy.
Frequently asked questions
01Are tree supports always better than normal supports?
No. They may help with certain curved or complex models, but broad contact areas or slender unstable branches may favour a different strategy.
02What support angle should I use for PLA?
There is no universal angle. Follow your slicer and printer profile, and test bridges and overhangs for the exact cooling, material and geometry.
03Do supports always leave marks?
Support contact can leave texture or scars. Orientation, interface spacing and design changes may reduce visible marks but cannot guarantee a perfect underside.
04Can the PrintZilla virtual printer generate actual supports?
The browser visualisation is educational. Manufacturing supports must be designed and verified in a suitable slicer for the real printer.
Sources and useful references
We link to official documentation and publisher guidance where useful. Advice and platform features can change; verify current details with the original source, your printer maker and relevant service provider.
See how layers and overhangs are built
Explore the virtual studio or ask for a real model's support and printability review before physical manufacture.
Open PrintZilla Printworks