What you need to know.
Peeling corners, spaghetti, first-layer gaps? Diagnose the real cause with a sensible step-by-step checklist before reaching for more glue.
- Clean the correct build surface first, using the manufacturer's care instructions.
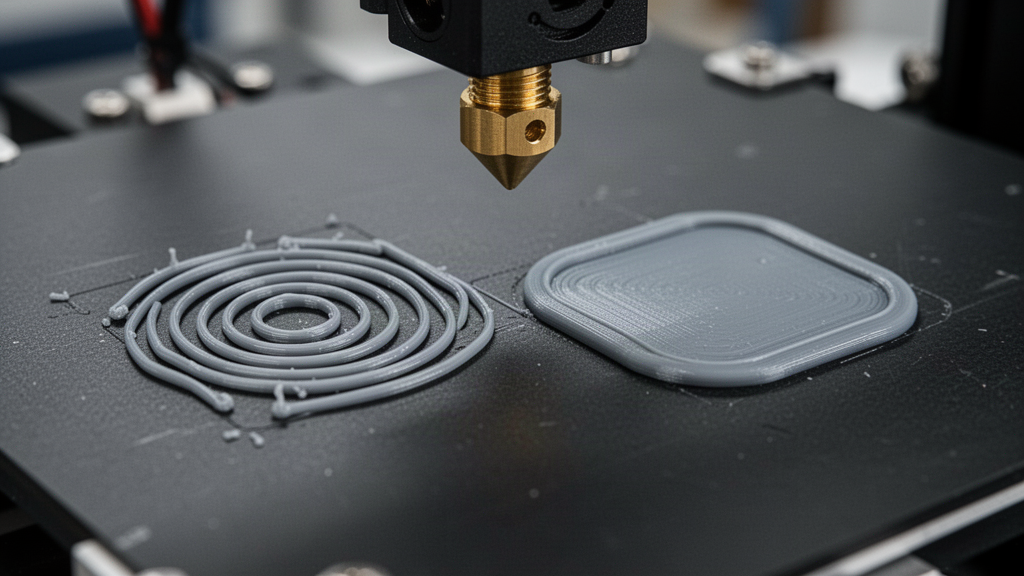
- Watch the nozzle height: separate round strands can mean too high; heavily ploughed ridges can mean too low.
- Check the material profile and slow the first few layers before making large changes.
- PETG on smooth PEI can bond excessively: a suitable textured or satin plate, or approved separation layer, may be essential.
The 60-second first-layer diagnosis
A print comes unstuck when the opening layers cannot hold on to the surface, or later stresses overcome that grip. Instead of changing five settings at once, look closely at what actually happened. Did the filament never adhere? Did the front corner begin curling after twenty minutes? Did the nozzle knock over an otherwise solid part? Different symptoms have different fixes.
- Individual round lines following the nozzle around without sticking: check plate cleanliness, nozzle height and temperature.
- A wavy, ridged or scraped first layer: the nozzle may be too close; stop before it damages the plate.
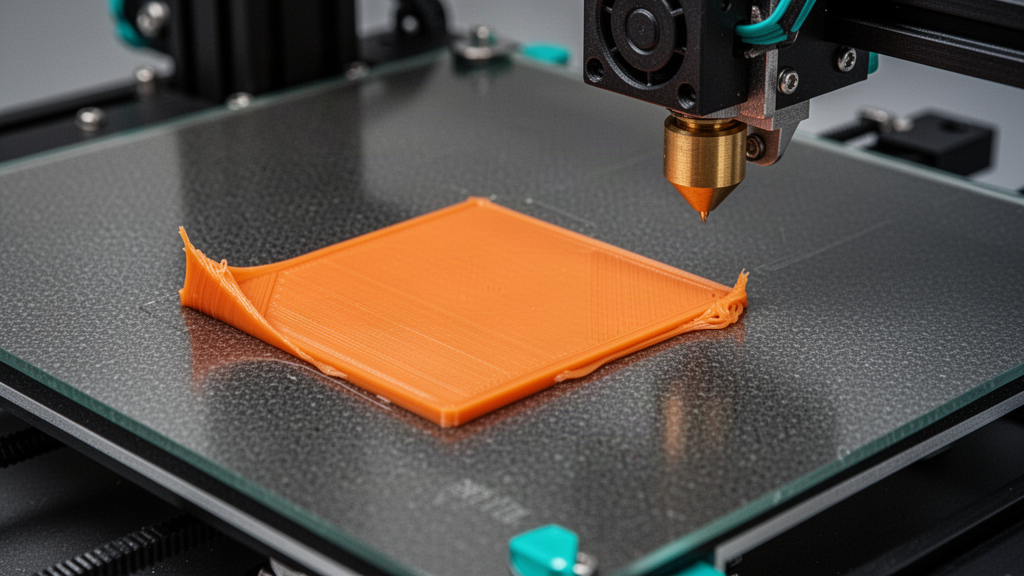
- One corner lifting after several layers: investigate drafts, cooling, geometry, brim and material shrinkage.
- The whole print shifts suddenly late in a job: inspect initial contact area, collisions, warping and excessive travel or acceleration.
1. Clean the build plate correctly
Skin oils, dust, old glue and fingerprints are common causes of patchy adhesion. For a removable PEI sheet, follow the printer manufacturer’s care instructions. Some PEI surfaces can be cleaned with warm water and a small amount of plain dish detergent, then thoroughly rinsed and dried. Check that the plate is cool and removable before washing.
A suitable high-purity isopropyl-alcohol wipe is useful on many compatible plates, but not every coating or consumable benefits from the same cleaner. Do not spray flammable cleaners onto a hot powered printer. Avoid harsh solvents or abrasive scraping unless specifically permitted by the build-plate manufacturer.
2. Check Z-offset and the first-layer 'squish'
The ideal first layer is pressed just enough for adjacent strands to join, without the nozzle ploughing through molten plastic. Too high: filament lines sit on the plate like loose shoelaces. Too low: the nozzle may scrape and create rough, translucent ridges or block the flow.
Use the first-layer calibration or Z-offset procedure recommended for your specific printer. Make tiny, measured corrections and let the calibration patch finish before deciding. Never drive the nozzle into the bed in pursuit of more grip.
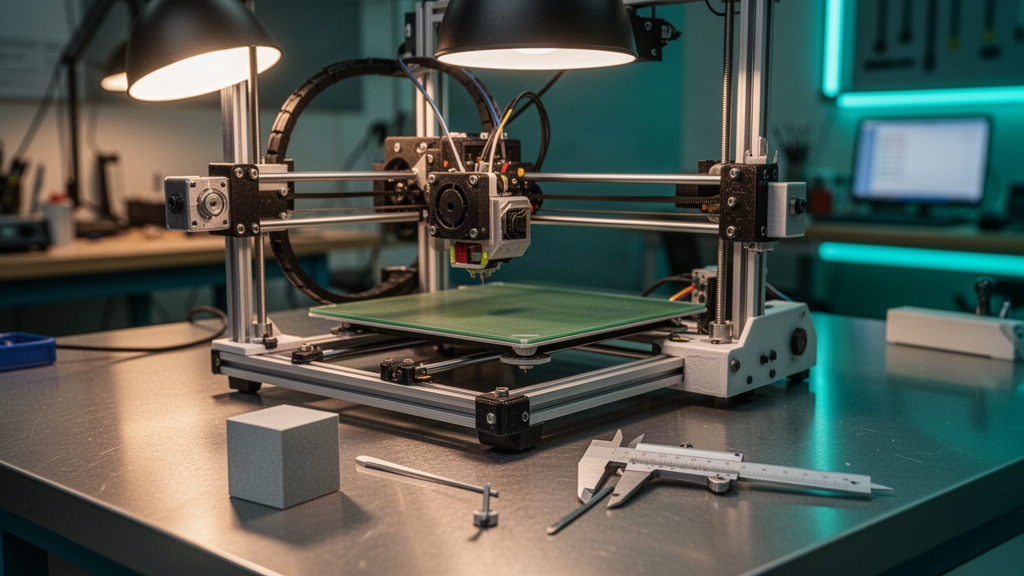
3. Use the right bed and nozzle temperatures
A too-cool build plate can let a fresh line release before it settles. Too much temperature can also distort the first layer or create other problems. Begin with the filament brand’s printed temperature range and an official printer/slicer profile, rather than a random number from social media.
For many conventional PLA profiles, a heated bed around 50–60°C is common; many PETG profiles run higher. Those are examples, not universal settings. Build-surface texture, filament formulation and room temperature change the result. Adjust one variable at a time in small increments if your manufacturer allows it.
4. Slow the first layer, not necessarily the whole print
A small reduction in first-layer speed gives extrusion and the bed more time to do their jobs. Start with the printer’s first-layer speed preset and consider a moderate reduction if lines drag or lift. Resist equating a printer’s advertised maximum travel speed with the speed your first layer should run.
The rest of a print can often run faster once the foundation is solid. Do not compensate for a mechanical levelling fault by pushing the speed or temperature wildly out of range.
5. Try a brim for small or narrow contact areas
A brim is a sacrificial ring of printed lines attached around the base of the model. It increases the contact area of narrow, tall or corner-heavy designs and is usually removed afterwards. For very small footprints, a modest brim can be the difference between success and another failed print.
Rafts lift the model onto a separate printed base, but they use more filament, take more time and can affect the bottom finish. Use one when the geometry and material justify it, not as the default response to a dirty plate.
6. Match your build plate to the filament
This one protects expensive equipment. PETG can adhere so strongly to a smooth PEI sheet that removing it damages the surface. Prusa recommends a textured or satin sheet for many PETG jobs, or a suitable glue-stick separation layer where using smooth PEI. Some speciality filaments require their own sheets and treatments.
Check compatibility before applying glue, tape, solvent, or abrasive treatment. Never use superglue on a print bed. If the print is stuck too firmly, let the surface cool fully and follow the manufacturer's safe removal instructions.
7–9. Check cooling, drafts and model geometry
- Avoid sudden cold drafts. A fan or open window can cool one side of a tall model faster than another. Use the manufacturer’s recommended environment for the material.
- Inspect first-layer fan settings. Some profiles deliberately use little or no part cooling for the opening layer to encourage bonding.
- Rotate or split an awkward design. A tall, long, thin corner can warp or lever against the build plate even when the initial layer looked perfect.
10–12. Eliminate mechanical causes
- Confirm the magnetic sheet is seated fully, the bed and gantry can move freely, and no print clips collide with the nozzle.
- Inspect the nozzle for partial blockage or residue. Inconsistent extrusion can mimic a bad Z-offset; follow the printer maker's approved unclogging procedure.
- Check whether the toolhead catches on curled edges, infill ridges or tall supports. Appropriate travel clearance, flow tuning and part orientation can help.
If the same issue keeps appearing, save your photos, filament details, plate type, temperatures and slicer profile. That short record is far more useful than guessing which knob to turn next.
Before your next print: a practical checklist
- Plate clean, undamaged and fully seated.
- Material and build surface compatible.
- Appropriate, manufacturer-approved nozzle and bed profile selected.
- First-layer calibration completed without scraping.
- First-layer speed sensible and extruded lines joined.
- Model has enough contact area; brim if justified.
- Cooling/drafts managed for the chosen material.
- The first few layers watched before walking away.
Still getting a failure? Start with a simple one-layer square and change only one setting between attempts. Once that test works, return to your actual model. Troubleshooting becomes much quicker when it is controlled and repeatable.
Frequently asked questions
01Why does my PLA not stick to a PEI bed?
Common reasons include oils on the bed, poor first-layer nozzle height, an unsuitable temperature profile or too much first-layer cooling. Check the plate maker’s cleaning guidance before changing settings.
02Should I use glue stick on every 3D print?
No. Many PLA prints work well on a clean compatible sheet without glue. With materials such as PETG on smooth PEI, an approved glue layer may instead protect the plate by helping release the print.
03Can I increase my bed temperature to fix every adhesion problem?
No. Excessive heat can cause defects and may damage incompatible surfaces. Start with the filament and build-plate manufacturer's ranges, then correct cleaning, calibration and cooling.
04What is the quickest first-layer test?
Print a small, single-layer calibration square and check whether adjacent lines join smoothly with no gaps, scraping or filament dragged behind the nozzle.
Sources and useful references
We link to official documentation and publisher guidance where useful. Advice and platform features can change; verify current details with the original source, your printer maker and relevant service provider.
Want to see what a good first layer looks like?
Watch PrintZilla's virtual nozzle and build plate from close-up angles. The demonstration is visual, not a physical bed-calibration tool.
Explore the virtual print studio